Contents
![]()
eDaktik Reminder
The eDaktik REMINDER automatically sends messages to course participants,
if certain conditions occur, e.g. an activity was not completed
at certain times, e.g. two days before the end of an activity / five minutes after course enrolment.
At the same time, reports can be sent to those responsible for the course.
This way the eDaktik Reminder automates the course process and makes it easier for participants as well as for managers to monitor course activities. It supports blended scenarios as well as self-training courses.
Create a reminder activity in the course
The activity is NOT a message that should be sent, but the place where all your messages concerning the course are created, managed and stored.
How to create an activity
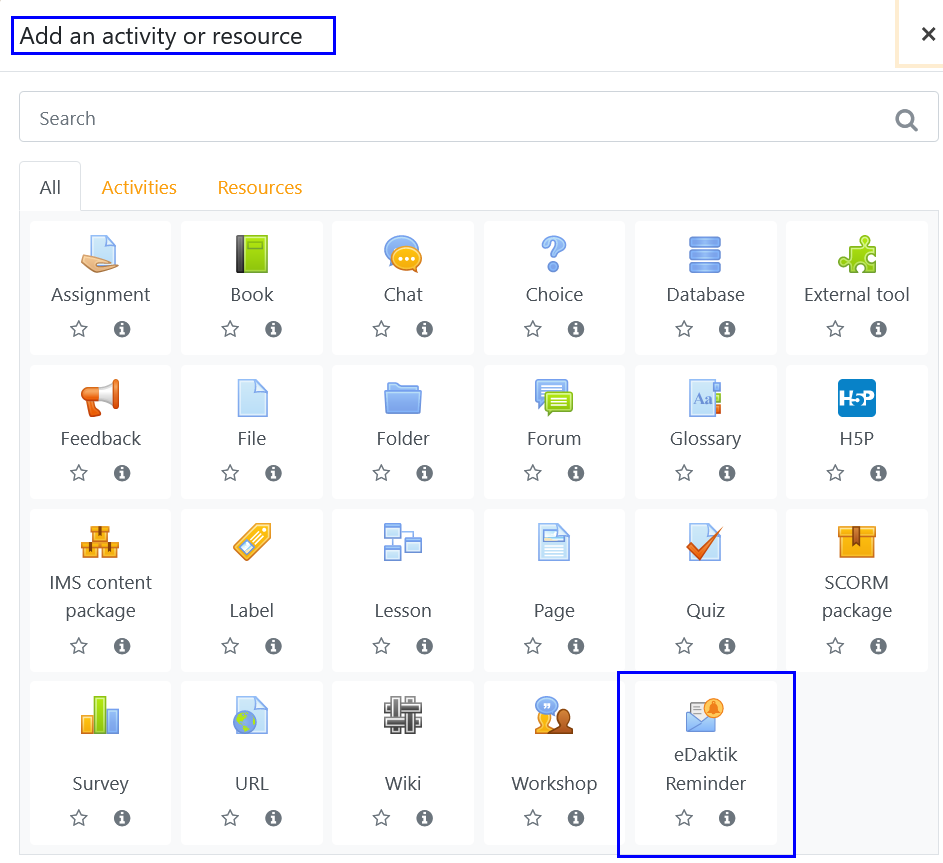
Register as a teacher in the course and turn on editing mode (gear symbol top right).
Click on ‘Add an activity or resource’ and choose the activity ‘eDaktik Reminder’.
Basic entries
Name
The activity appears under this name on the course frontpage. It is only shown to people with trainer status, participants will not see the activity at all.
Description
If you have more than one reminder activities in the course, it might be helpful to fill in a description.
The activity is created after saving.
Edit a reminder a reminder activity
If you want to change the basic settings of an already existing reminder activity, switch to edit mode and
click “Edit > Edit Settings” next to the reminder activity or
open the reminder activity, click the gear icon top right and select the menu item “Edit settings”.
Create a task
After you have created a reminder activity you can start seting up the single sending-tasks, that will be processed automatically. A ‘task’ is a message that will be sent. Within a task you define under which conditions a message is sent, who will receive it, at what time. The eDaktik Reminder will execute these tasks automatically.
To create a task
Register as a trainer in the course
Click on the ‘eDaktik Reminder’ activity
Switch to the tab ‘New task’
General
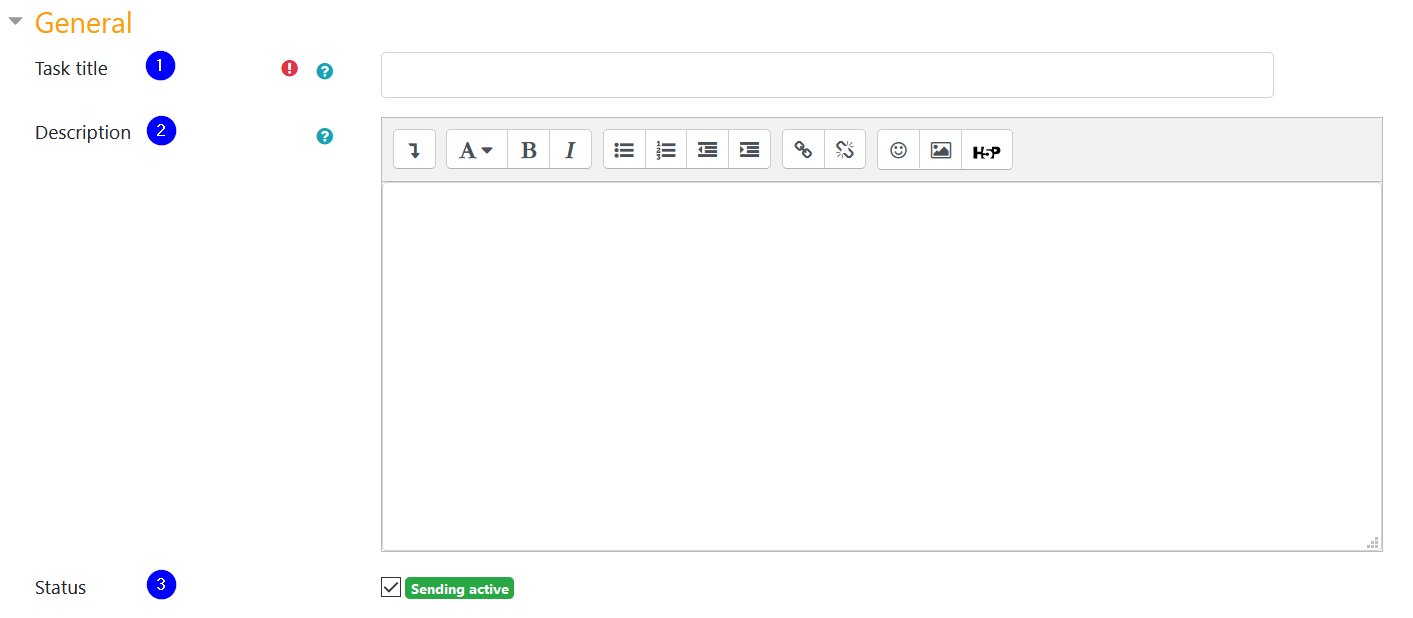
(1) Task title
Name of the reminder task, NOT the subject of the message. Choose a name that helps you to identify the task. It will be displayed in the ‘Task overview’ tab.
(2) Description
If necessary, describe the contents and conditions of the reminder task in detail. The description will also be shown in ‘Task overview’ where it will help you to identify individual tasks and their status.
(3) Status
The checkbox “Sending active” is ticked by default. If you just want to prepare the task without sending any messages yet, deactivate the checkbox.
To whom to send
Define the criteria according to which the recipients are selected. ALL criteria set here are taken into account.
Send to users meeting condition
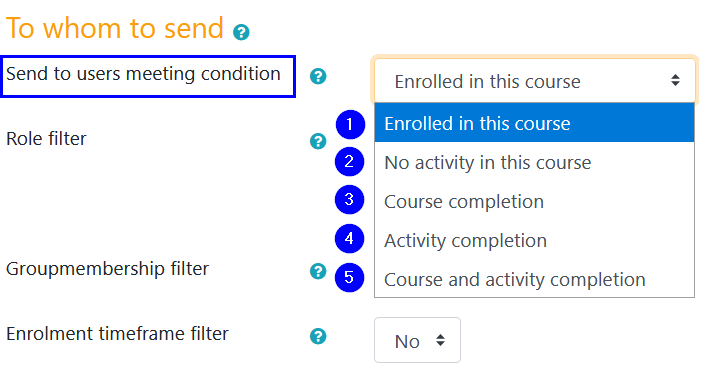
(1) Enrolled in this course
Users who are enrolled in the course will be selected - regardless of their activities in the course.
(2) No activity in this course
Selects all enrolled users who have never entered the course.
(3) Course completion
Users having a certain status - completed or not completed - are selected
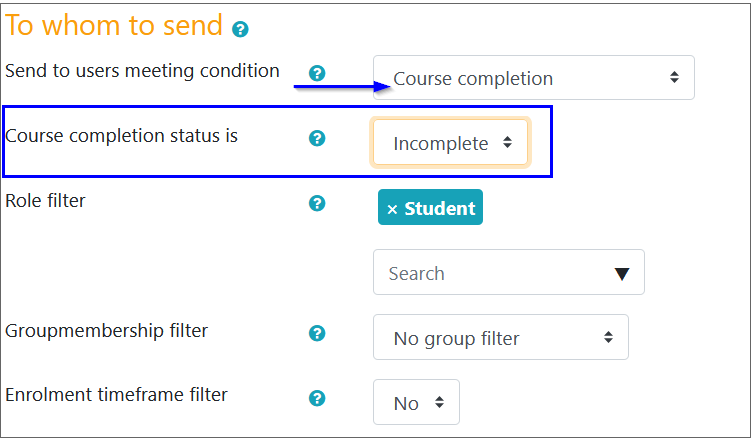
Please note that a course completion must be set for this option to be usable.
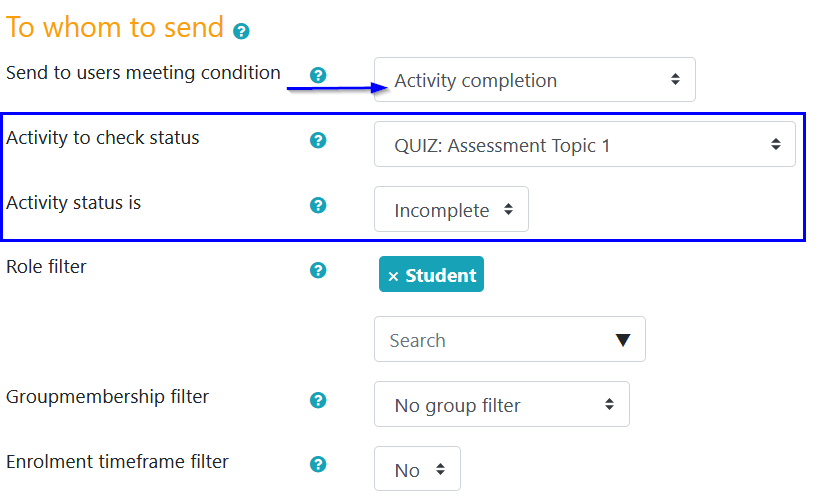
(4) Activity completion:
Users who have a certain processing status of an activity are selected, e.g. those who have not yet completed a quiz.
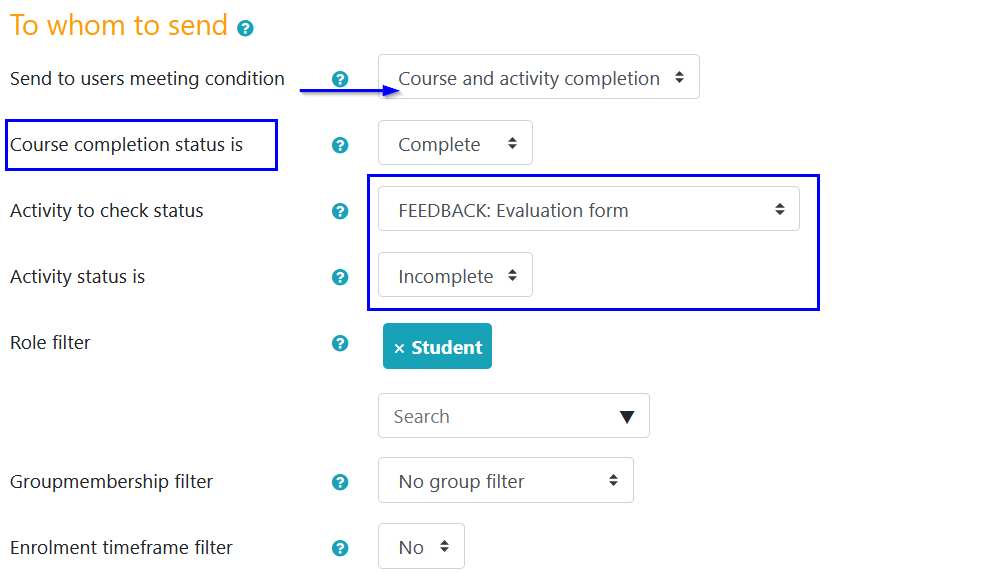
(5) Course and activity and completion [PRO version only]
Activity and course completion criteria can be combined if necessary
Role filter
Select the role that a user must have in the course to receive the message. In most cases these will be the ‘students’ in the course, for other scenarios you can pick any other role.
Multiple choices are possible.
The ‘student’ role is selected by default. If no role at all is selected, all users enrolled in the course will be addressed.
Groupmembership filter
The selection of the recipients can be further specified using group membership of the course participans.
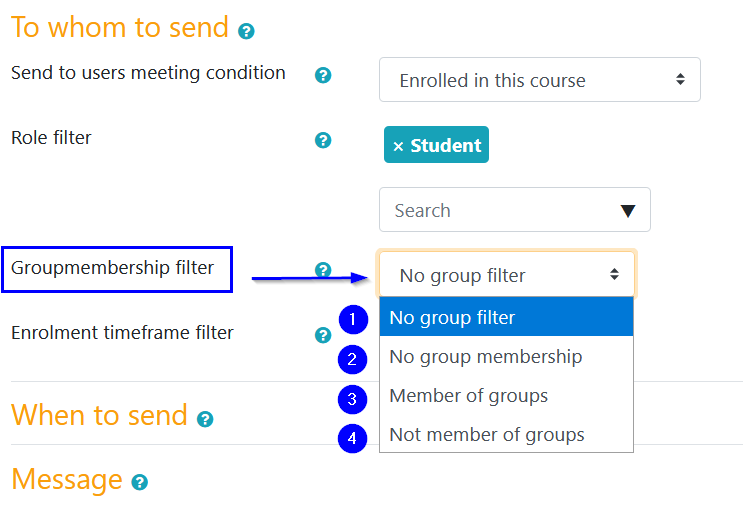
(1) No group filter
Group membership is not relevant for selecting the message’s recipients.
(2) No group membership
Users who do not belong to any group are selected.
(3) Member of group(s)
All groups in the course are listed, one or more can be selected. Users who at least belong to one of the selected groups are filtered.
(4) Not member of group(s)
All groups in the course are listed, one or more can be selected. Users who are NOT member of at least one of the selected groups are filtered.
Enrolment timeframe filter [PRO version only]
You will need this setting, if the time of the user’s course enrolment is relevant. You can set up a time period before and/or a time period after a specific date of enrolement.
When to send

The message can be sent at a fixed date or at a date that is linked to a condition - e.g. two weeks before the course ends.
If the reminder is to be sent at a certain date, set it up in the ‘fixed date’ section.
Alternatively, you can link the delivery time to conditions. To do this, select “Date based on condition”.
Condition type
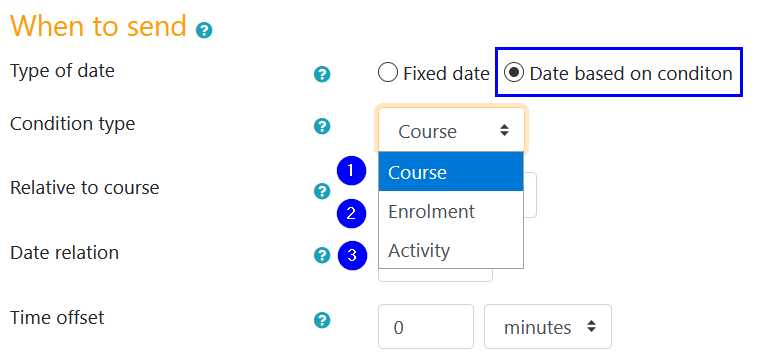
(1) Course
The delivery date relates to the course.
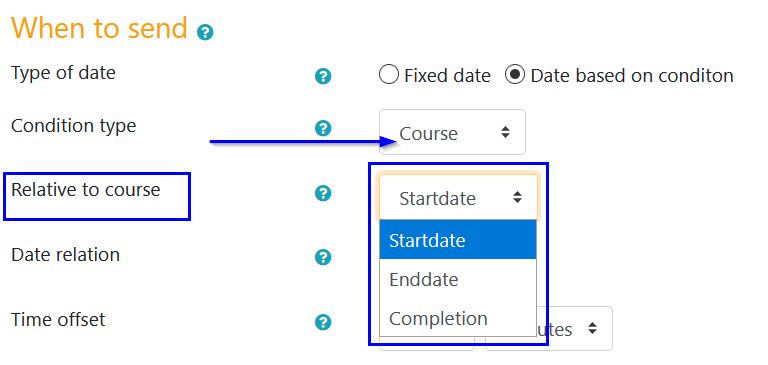
You can choose between:
Startdate: “Course start date” as set in the course settings.
Enddate: “course end date” as set in the course settings.
Completion: The date on which the user meets all conditions that are required to complete the course.
(2) Enrolment [PRO version only]
The delivery date relates to the enrolment of the user in the course.
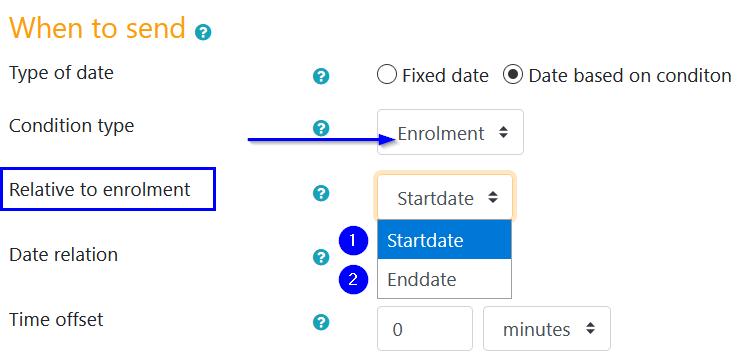
You can choose between:
Startdate: The time at which the user’s enrolment in the course starts.
Enddate: The time at which the user’s enrolment in the course ends.
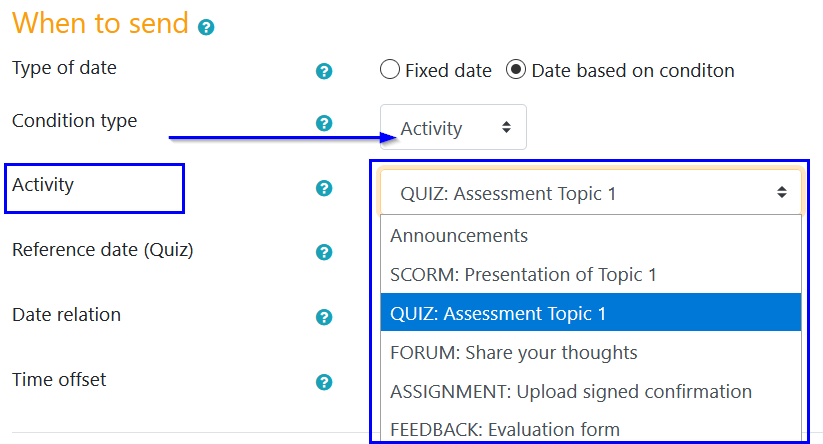
(3) Activity [PRO version only]
The delivery date relates to a specific activity in the course.
Activities itself are provided with different ways of time limits. “Assignments” have a due date, at which delivery is expected, giving “Feedback” can be limited to a specific time period, etc. Any activity in your course that has been setup with a time limit can be selected as the reference date for the delivery of a reminder message.
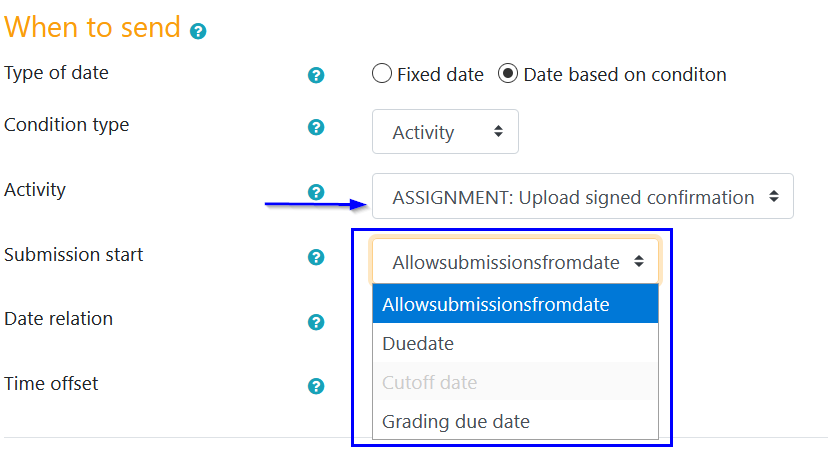
Relative to/Reference date
The date options belonging to the selected activity will be displayed, choose the one relevant for your reminder message. If an option appears grayed out, that means it is not used within the activitiy and therefore can not be chosen.

Date relation
Choose whether the reminder should be sent BEFORE or AFTER the selected reference date. Did you choose the course completion date, you can only send the reminder AFTER this date. As the course does not end at a given time, but as a result of meeting conditions, participants will have their individual timelines to get there.
Time offset
Set the intended period, e.g. 1 week (before the end of the access to the quiz).
Message
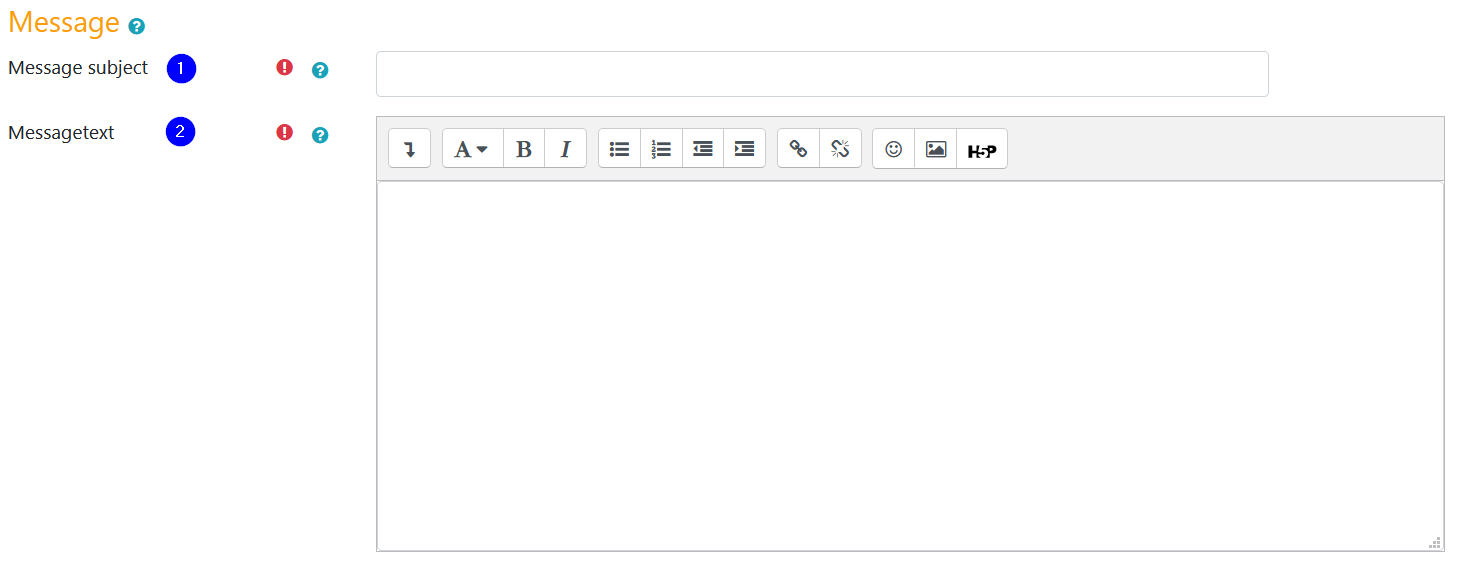
(1) Message subject
Subject under which the message should be sent.
(2) Message text
Write your message here. You can use these placeholders:
###userfullname###
is replaced by the user’s first name and surname or last name and first name - depending on the language setting of your platform.
###useremail###
is replaced by the user’s email address.
###coursename###
is replaced by the full course name.
###courseurl###
is replaced by the url https: //…/course/view.php? id = of the course.
Report
The eDaktik Reminder provides you with the option to receive a report. If you want to monitor the messages that have been sent as a result of a task, set “Send report” to “Yes”
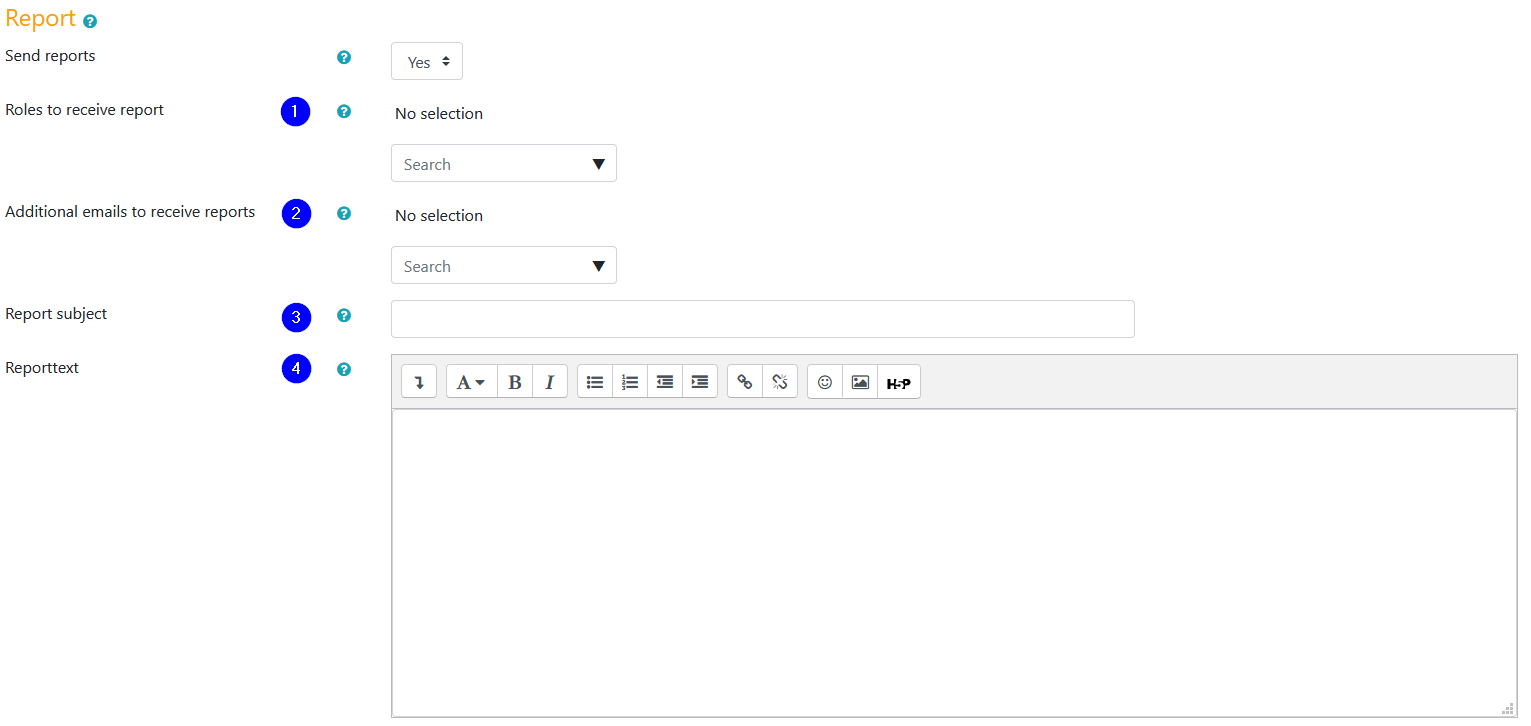
Roles to receive report
Select the role that a user needs to have in the course to be able to get the report. If no role is selected, no one will receive a report (unless you enter an address at “Additional email to receive report”).
Additional email to receive report [PRO version only]
Enter the email address of the required recipient.
Warning: As the report may contain personal information, please ensure that all recipients of reports are authorized to receive this information.
Report subject
Subject under which the report should be sent.
Report text
Write the text of the report here. You can use these placeholders:
###coursename###
is replaced by the full course name.
###usercount###
is replaced by the number of users who have received a message.
###users###
is replaced by a list of user’s names to whom the message was sent.
To save the task, select “Save changes”.
Task overview
The individual reminder tasks are listed in the overview and contain the title and description of the task as well as the following information:
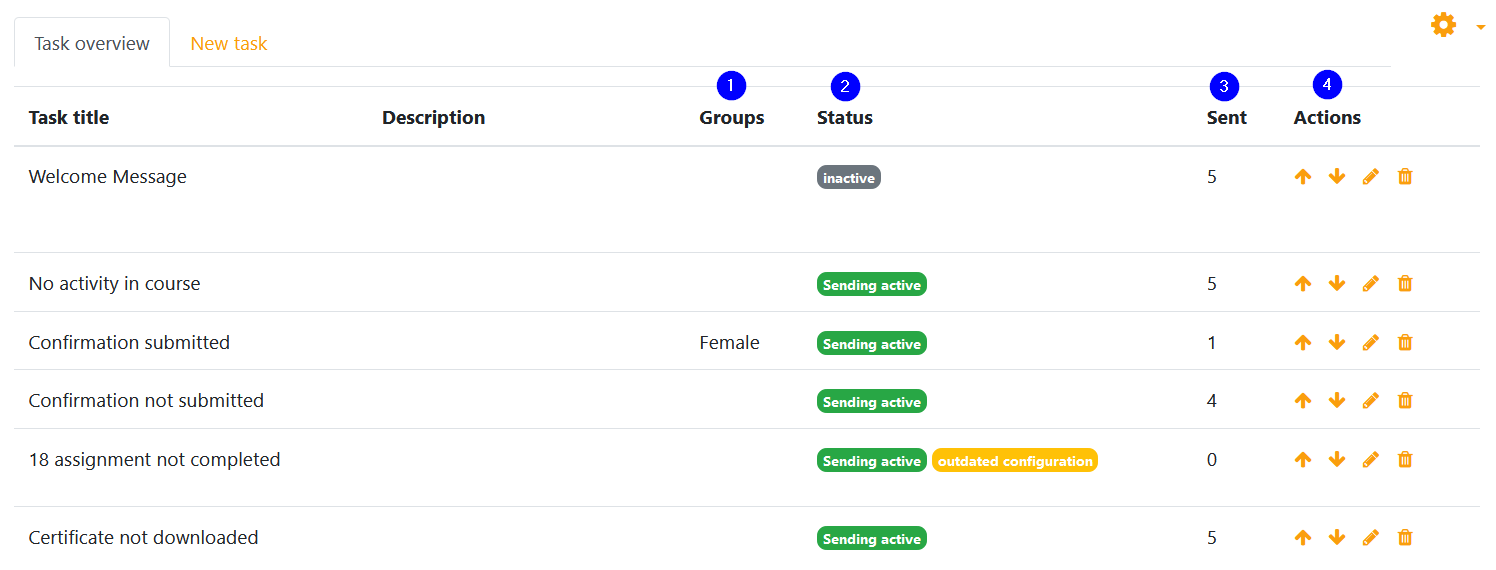
(1) Groups
Which group is/which groups are intended to receive the message.
(2) Status
Sending active: If the task is active, messages are continuously generated.
inactive: Tasks from which no messages are sent.
Outdated configuration: The task must be edited because information, that is essential for processing the task is missing. This will occur if reference points are missing, e.g. the message refers to an activity, but no activity is chosen or a group that has been selected as recepients is not exiting. Missing reference points often occur with imported/restored reminder activities.
(3) Sent
Number of messages that have been sent via this task so far.
(4) Actions
Arrow up: Move task up in the list.
Down arrow: Move task down in the list.
Pen: Edit the configuration of the task.
Recycle bin: Delete the task.
Plugin settings
The settings can be found at:
Website administration> Plugins> Activities> eDaktik Reminder
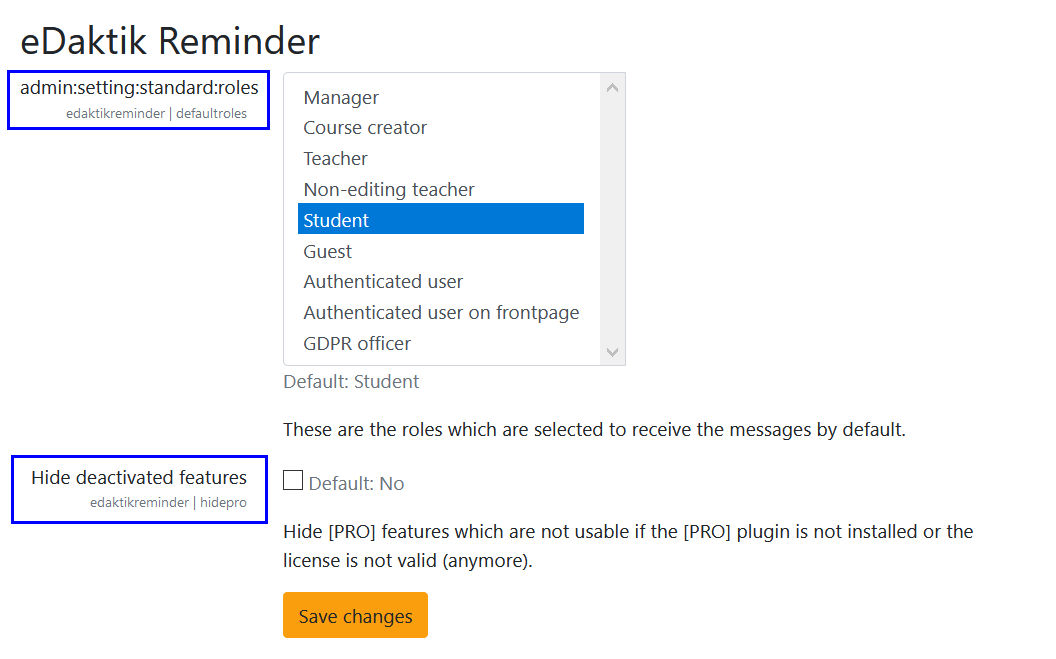
Here you can
change the standard-role that is to receive messages here
hide features that are not available due to license conditions (PRO version required, expired license…)